
如何在 WishPost 上申请开具发票?
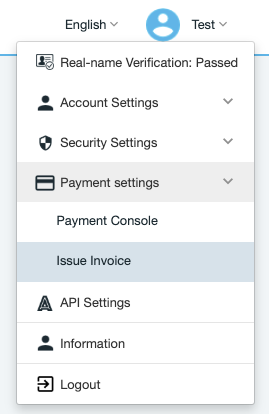
WishPost 商户可在其 WishPost 账户中申请开具物流费用的发票。商户可在 WishPost 官网上,点击用户名,选择“支付设置”>“开具发票”,申请开具增值税普通发票或形式发票。本篇 FAQ 将向您说明在 WishPost 上申请开具发票的前提条件和具体流程。
如何在 WishPost 中确认我的开票信息?
自北京时间2019年11月1日0时起,在 WishPost 中申请开具发票之前,所有 WishPost 商户必须在其账户的“信息”页面完成以下步骤:
点击您的用户名,点击“信息”,在“开票信息”部分填写、确认、提交并维护正确的开票信息。
在上述页面中阅读并同意《Wish邮开票功能使用守则》,然后提交正确的开票信息。
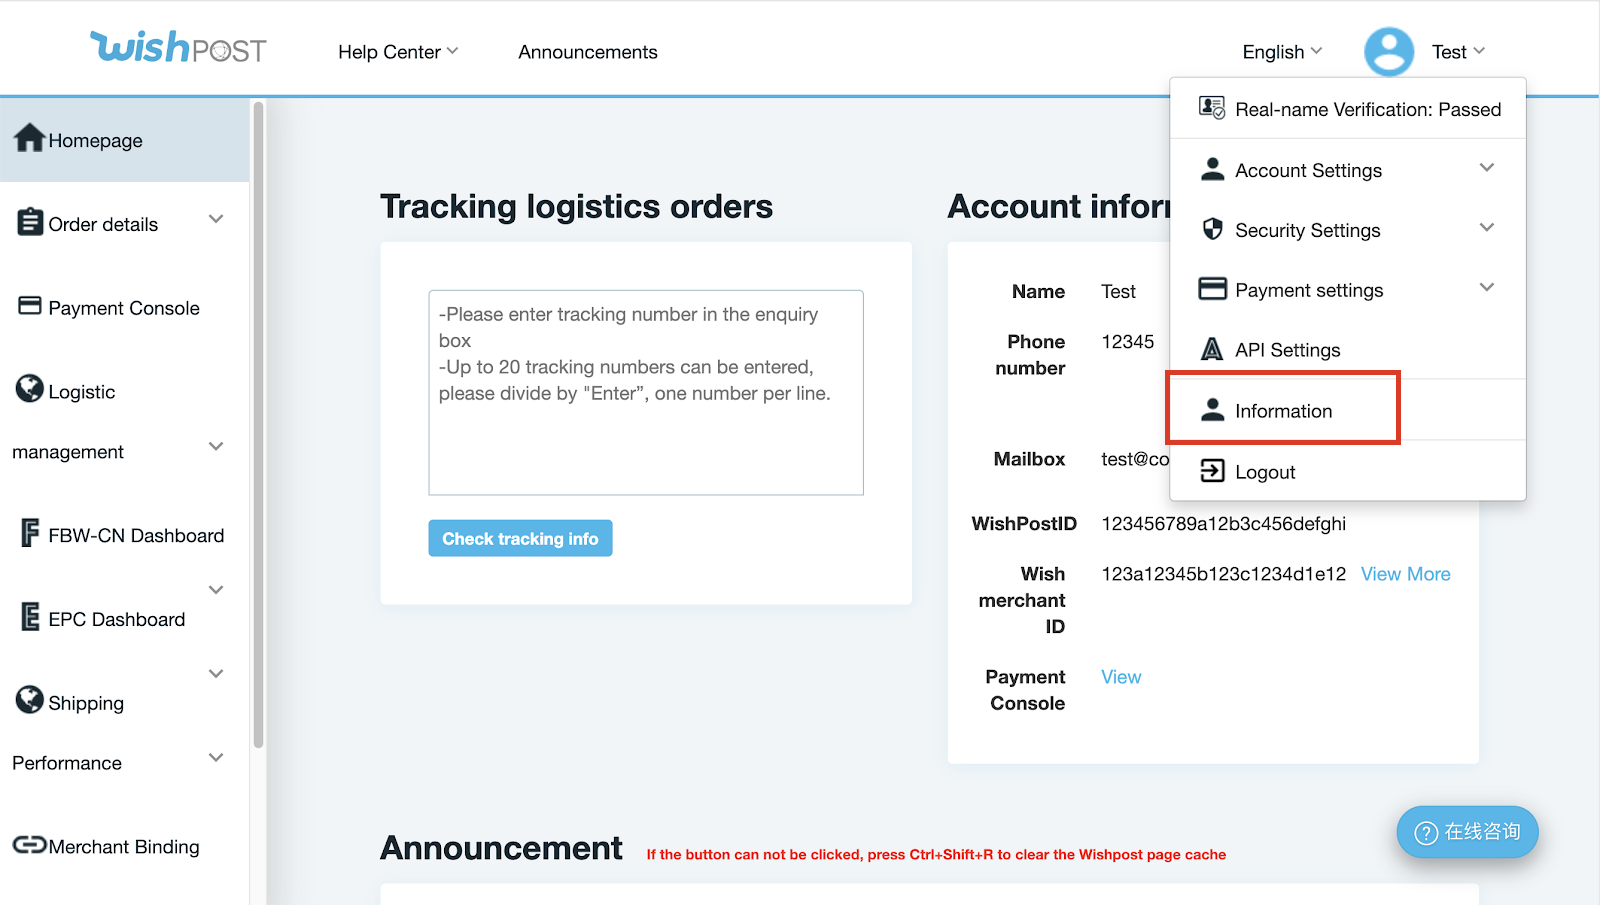
具体而言,若需要在 WishPost 中填写开票信息,请首先登录您的 WishPost 账户。在页面右上角点击用户名,在下拉菜单中选择“信息”。
在申请开具发票之前,首先需要填写与您 WishPost 账户相关联的商户公司的正确开票信息。如下图所示,您可在“开票信息”部分填写正确的开票信息。在此页面填写并提交后,您将无法再更改开票信息。因此,请在提交前仔细核对开票信息,确保信息准确。每个 WishPost ID 只能和一组开票信息相关联。
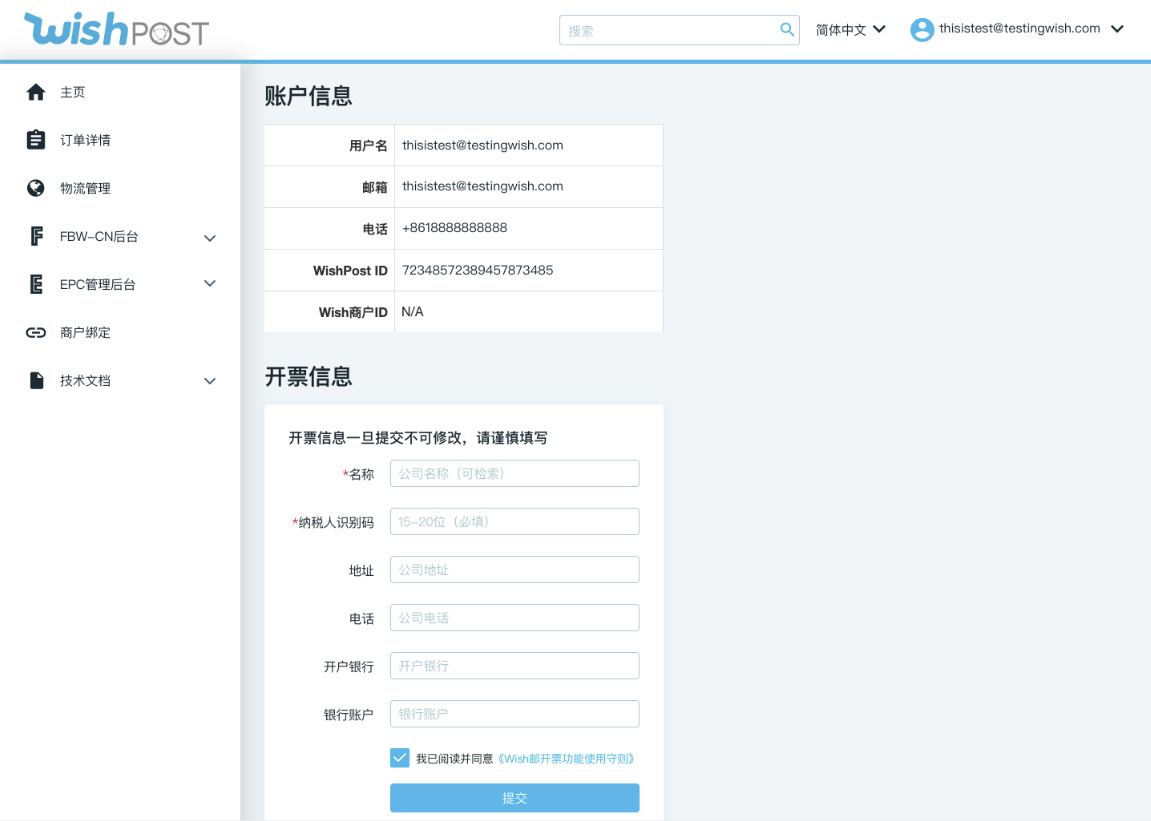
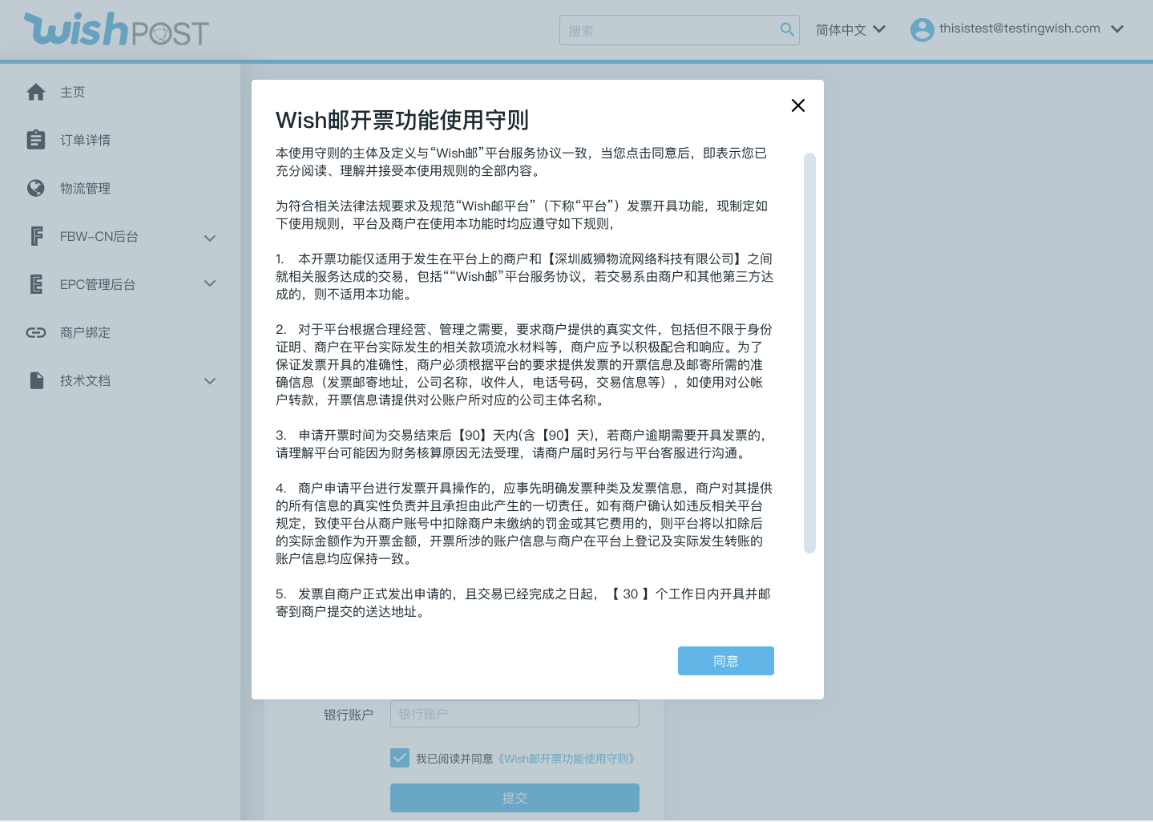
在点击“提交”前,您还需要勾选“开票信息”底部的“我已阅读并同意《Wish邮开票功能使用守则》”复选框。您可以点击“Wish邮开票功能使用守则”,阅读弹窗中的守则内容(如下图所示):

认真阅读完后,请点击“同意”以关闭弹窗,并返回到“信息”页面。
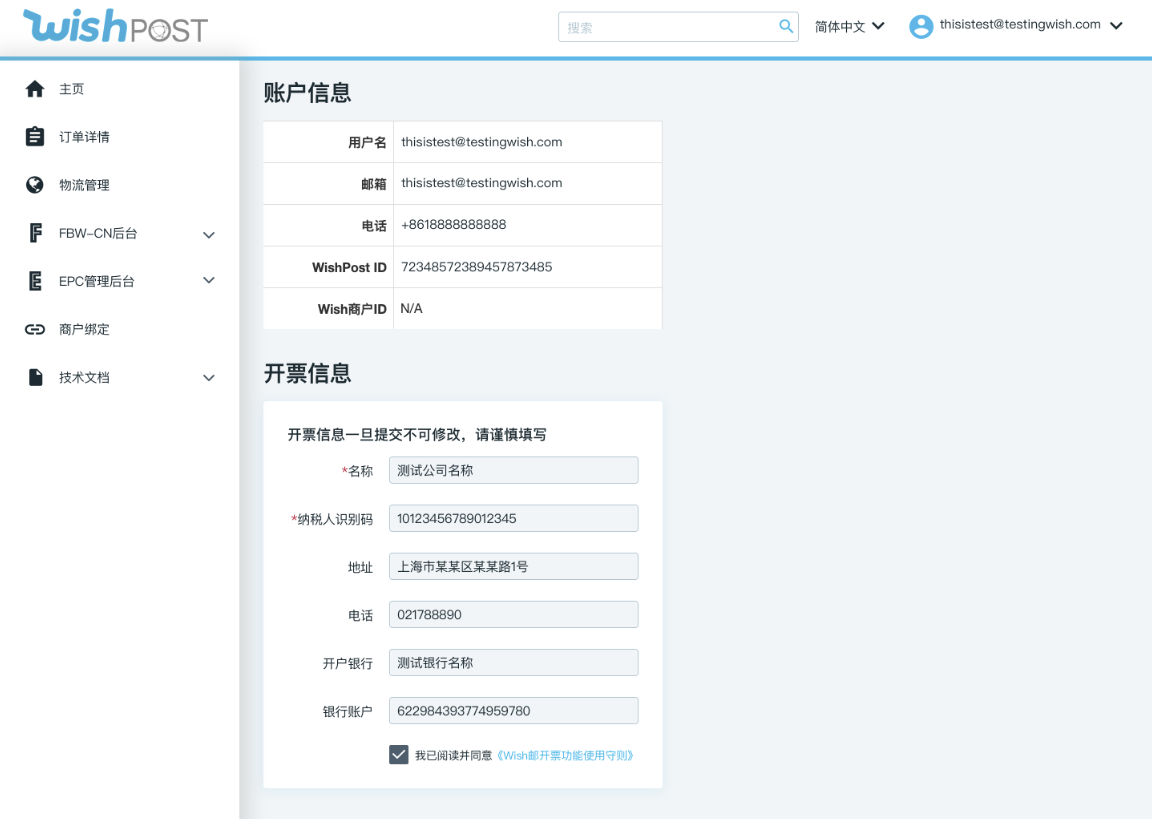
在完成以上步骤后,点击页面底部的”提交“,以提交您的开票信息。请注意,一旦提交,只有通过联系 WishPost 客服才可以对开票信息进行修改。成功确认并提交开票信息后,“信息”页面显示如下:
要求您完成上述步骤旨在满足国际合规要求,以及帮助您提供正确的开票信息,以便顺利开票。
如何在 WishPost 上申请开具发票?
根据上述步骤填写并提交正确的开票信息后,您可以在 WishPost 主页点击右上角的用户名,在下拉菜单中选择”支付设置“>”开具发票”:
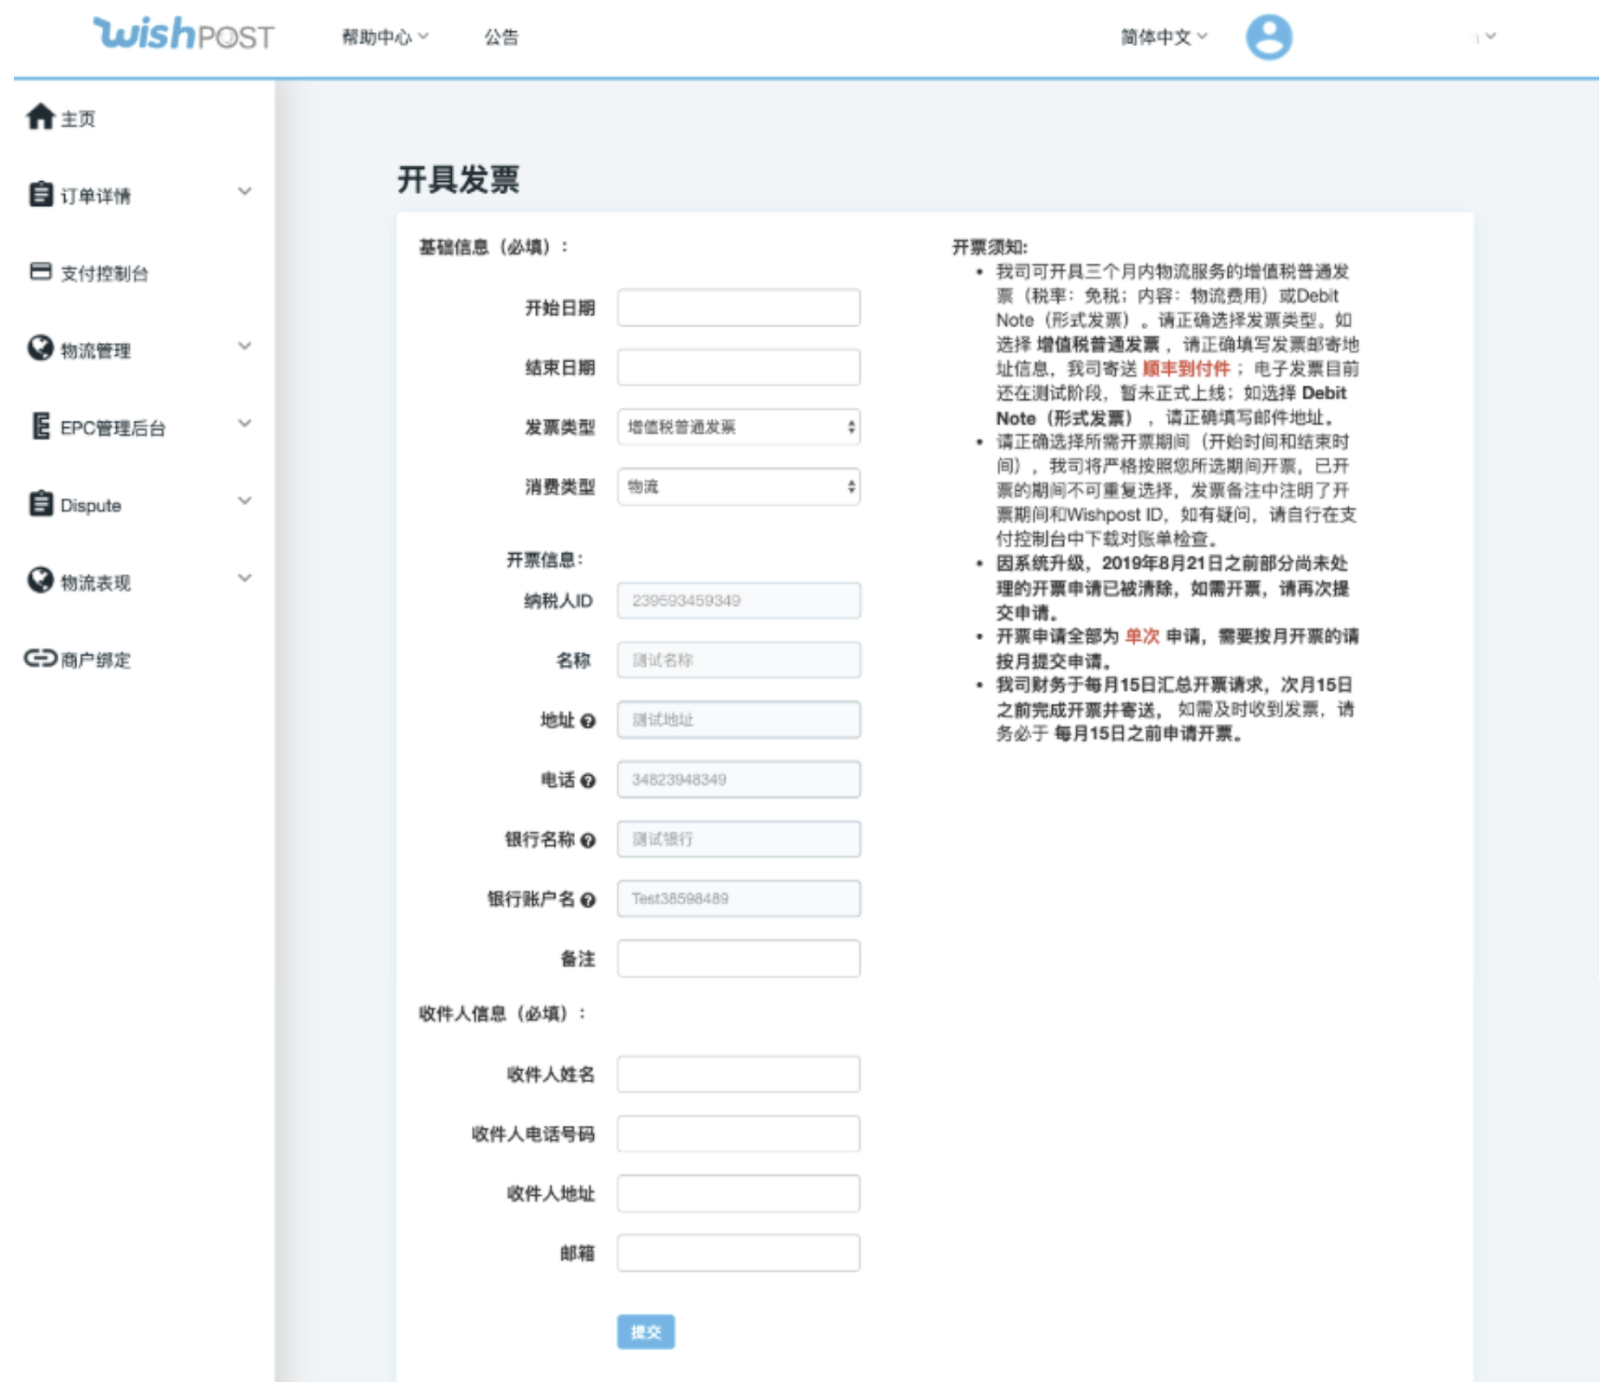
在此页面,您在上述步骤中提交的开票信息将自动填充到相应位置,不可手动填写或编辑(如下图所示)。填写其他所需信息,并点击“提交”,即可申请开票。
若您对申请开票有其他问题,请通过账户页面右下角的“在线咨询”按钮联系 WishPost 客服。

wish商户官网原文详情:
How to apply for invoices on WishPost?
WishPost merchants may apply for invoices via their WishPost online account for their logistics-related expenses. In particular, merchants are able to apply for General VAT Invoice (增值税普通发票) or Debit Note (形式发票) by visiting their username > Payment settings > Issue invoice page on WishPost. This FAQ walks merchants through the prerequisites and actual process for applying for invoices on WishPost.
How do I confirm my billing information on WishPost?
Effective November 1, 2019 00:00 Beijing Time, all WishPost merchants must complete the following new requirements on their WishPost account’s Information page before applying for invoices on WishPost:
Input, confirm, submit, and maintain their correct billing information for their WishPost account in the “Billing Information” section of the user icon > Information page on WishPost.
Agree electronically to the “Policy for WishPost Invoice Issuance Function” on the same above-mentioned page before submitting the correct billing information.
Specifically, to enter your billing information on WishPost, log in to your WishPost account. Select your username dropdown in the top right corner, and select ‘Information’ from the dropdown.
Before you are able to apply for invoices on WishPost, you need to first enter the correct billing information of the merchant company associated with this WishPost account. In the screenshot shown below, you may enter the correct billing information in the “Billing Information” (“开票信息”) section of the page. Once entered, reviewed, and submitted on this page, your billing information can no longer be changed. Therefore, please review the billing information you enter carefully as each WishPost ID may only have one set of billing formation associated.
At the bottom of the “Billing Information” section, you must also click a checkbox to indicate that you agree to the “Policy for WishPost Invoice Issuance Function”, as shown below, before clicking “Submit”. You may click on the “Policy for WishPost Invoice Issuance Function” hyperlink to view the entire document in a popup modal that follows:
After you carefully read through the above document, click “Agree” to close out the popup modal and return to the Information page.
After completing the above two steps, click “Submit” at the bottom of the page to submit your billing information. Note that once you submit the billing information you entered, it cannot be changed without contacting the WishPost Customer Service team. Your WishPost ‘Information’ page will look like the below once you have successfully confirmed your billing information.
The goal of completing the above steps and follow these requirements is to meet global compliance guidelines and help merchants smoothly apply for invoices on WishPost with accurate billing information.
How do I apply for invoices on WishPost?
Once you have entered and submitted your correct billing information on your WishPost account as described above, then go to your username dropdown in the top right corner and select Payment setting > Issue invoice:
Here your confirmed billing information submitted in the steps outlined previously will be auto-populated in the necessary fields, which will not allow manual entry or manual edit as seen below. Complete the other fields and select “Submit”.
If you have any further questions about the above steps, please contact WishPost Customer Service via the popup modal in the bottom right corner of your account.


文章内容来源:wish商户官方网站